Looking for resources to further my learning in how to display data using Tableau, I stumbled across an interactive resume concept. Creating a resume in Tableau is billed as a great way to showcase your Tableau skills and your experience. This medium allows for more creativity and freedom in how much information you can convey.
Step 1: Gather data.
Most of the hard work is already done if you have a resume or a fleshed-out LinkedIn profile. Additionally, think about how to chart your resume and what metrics could be used. Then, put it in a format that can be used in Tableau.
Step 2: Organize data.
Using Excel to organize and store data for this endeavor, the structure I used is one experience or project per row. I have a separate sheet for work experience and one for projects.
Step 3: Choose visualization type
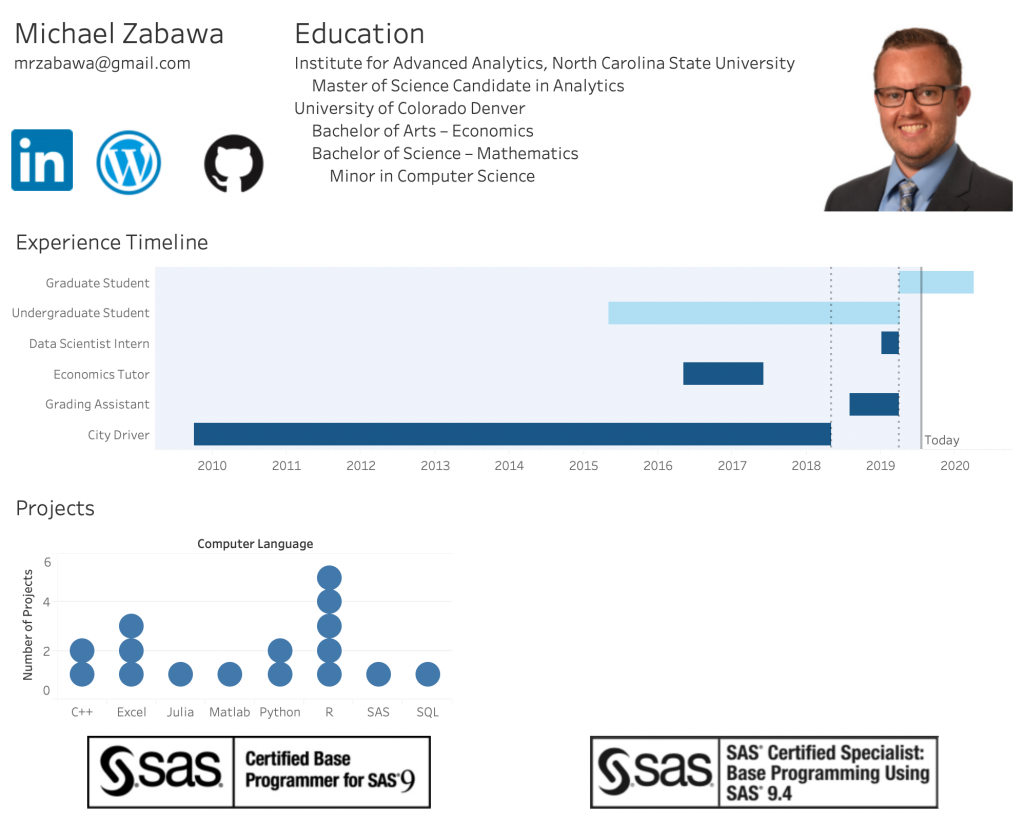
I chose to visualize my experience as a timeline. This was to emphasize that I worked full time and was a student during the same period. The sheet below is a modified Gantt chart with details pertaining to each segment.
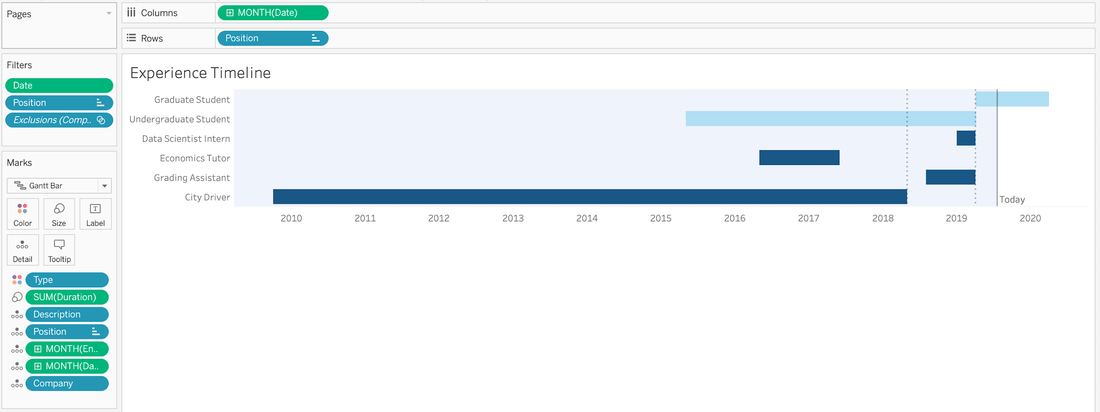
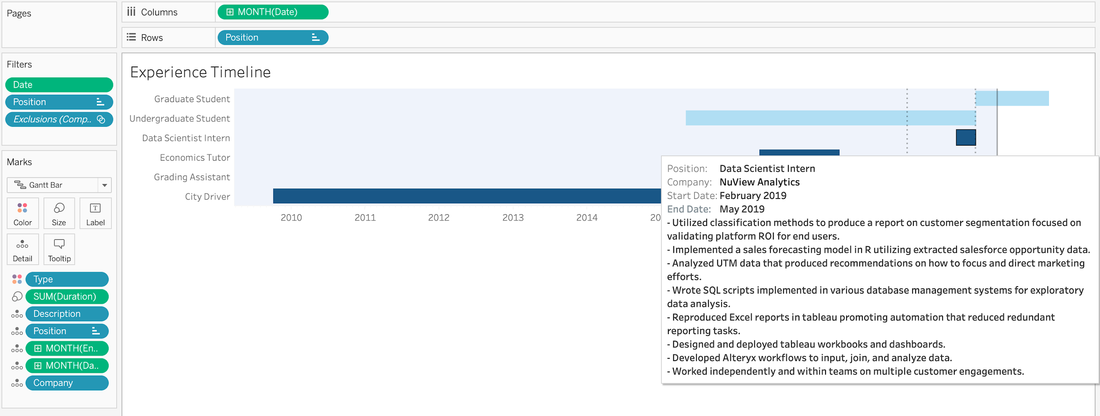
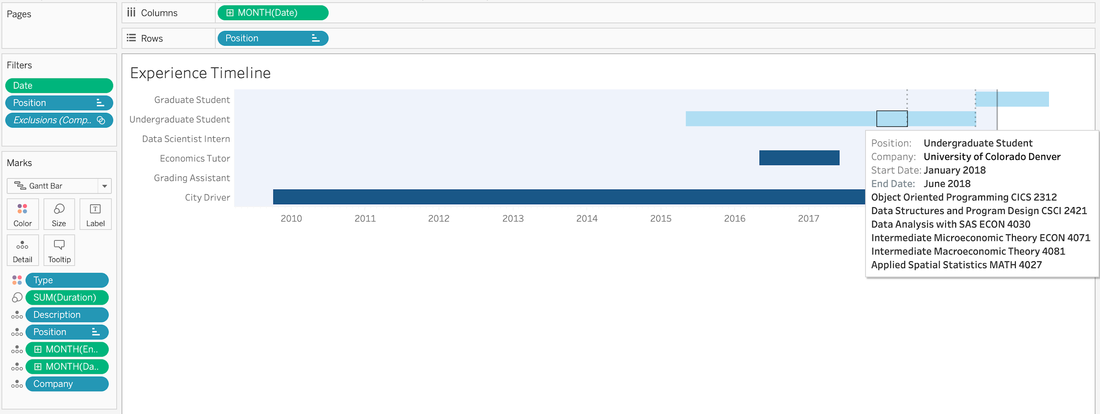
If the experience is a job, the extra detail is a bulleted list that describes the experience, similar to how you would view or compose a traditional resume. For educational experiences, the detail shows the courses I was enrolled in during that period of my collegiate career. You can see an example below.
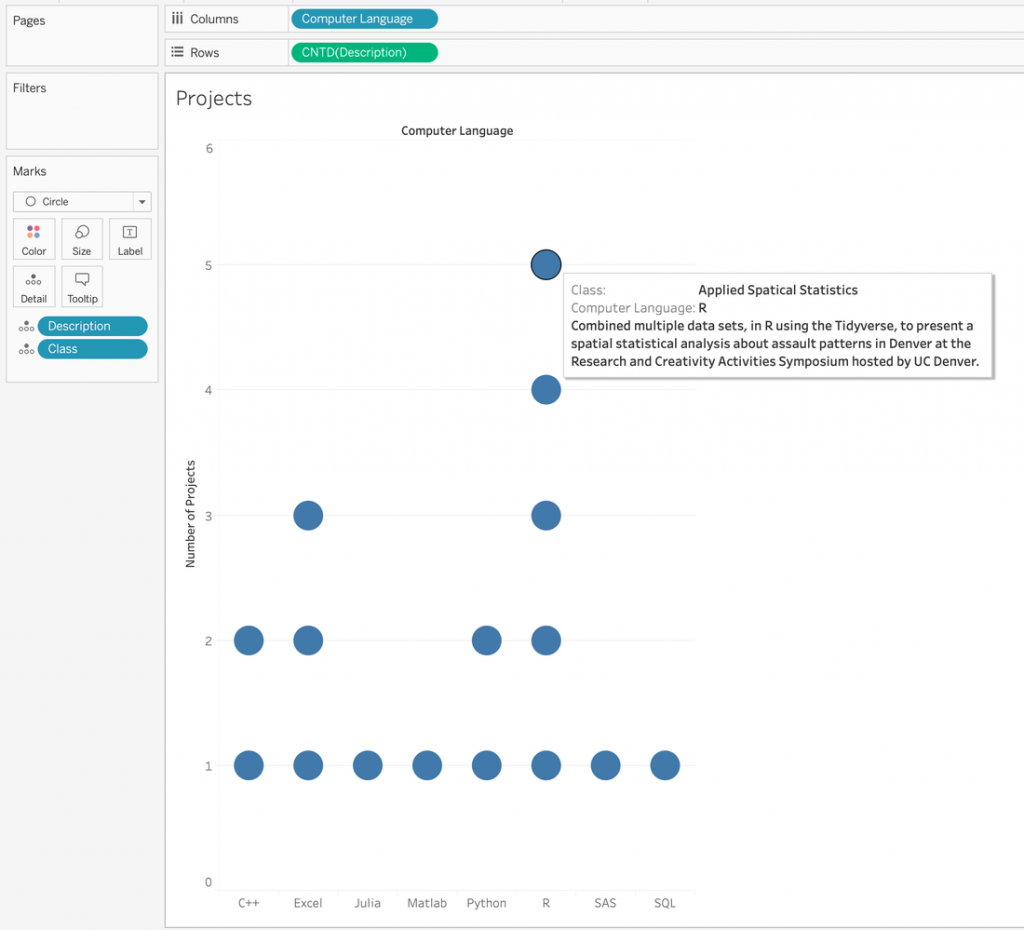
For the second visualization, I wanted to show what computer languages I used and what types of projects I did with them. For this, I used a dot plot with the details shown when the user’s cursor hovers over each dot. This extra dimension shows how many projects or courses I completed with the language in a concise fashion. The detail information is the course and a short description of the project or assignment. The chart provides more information than the traditional resume through visualization.
Step 4: Combine into a single dashboard
Now that you have your sheets, combine them into a single dashboard. In the dashboard, other resources like a LinkedIn profile link can be added so that a prospective employer will be able to have more information at a click of the mouse.
Step 5: Publish to Tableau public
Publish the resume to Tableau public so that you can share it with the world. The interactive resume is a living document just like your hard copy resume. Change it as you gain new ideas for visualizing or measuring your experiences. The resume will also grow with your career; adding to the Excel sheets will update the Tableau workbook, and all you need to do is push the change. There are many ways to accomplish this, and I hope that you found some inspiration in this post.
Now, go out and be creative.
Columnist: Michael Zabawa
https://public.tableau.com/en-us/s/interactive-resume-gallery
Data Column | Institute for Advanced Analytics
The Collaborative Blog for Students in the Master of Science in Analytics
