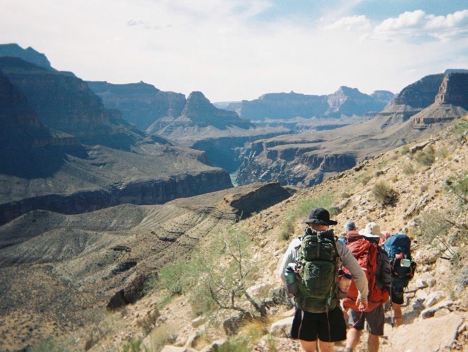
What better way to celebrate college graduation than to live in the Grand Canyon for four days with nothing but a sleeping bag, a change of clothes, and only the essentials?
I decided to make this trip with my longtime friend to enjoy my last drop of free time before this intensive 10-month program at the Institute for Advanced Analytics. This was one of many livening backpacking adventures I’ve had throughout my life, so I would like to share with you some advice from my experiences so that you can plan a trip of your own!

1. Plan Your Route
Find a map of the area and locate camp sites, sources of water, and account for mileage. Depending on how adventurous you are feeling, you may be hiking 10-15, or even 20 miles per day. Everything you pack and plan for on this trip hinges on the route you pick, so be sure to do your research first and select the path that perfectly fits your needs.
2. Pack Light
Only bring the essentials. As you progress through your hikes, the hills feel steeper and your body starts to tire, so you will thank yourself for the lighter load. You do not have space in your pack for all the luxuries you have at home.
Bring AT MOST 2 extra sets of clothes. Yes, it sounds disgusting, but whenever you reach a water source, you can soak your clothes and let them dry during the day, weather permitting. Plan with your buddies for how to evenly distribute group gear so that no one person is carrying too much. The crew can only move as fast as the slowest person.
3. Bring Lots of Water
I know I said to pack light, but water is the most essential thing to bring.
Bring four 1-liter water bottles and one smaller water bottle to be used separately for energy drinks.
Especially in the hot weather, your body will require far more water than usual. Without proper hydration, your body will cramp and begin to shut down way faster than you might think. Trust me on this. In a true backpacking experience, you will not have purified water sources on the trail. So, plan to bring iodine purification tablets or a water filtering pump to collect water from streams or other natural sources. You should never plan a route that does not have water sources along the way.
4. Bring Lightweight, Nutrient-dense Food
This includes bagels, granola bars, peanut/nut butter, dried fruit, salmon or tuna packets (NOT CANS), hard cheese, meats, nuts, seeds, trail mix, etc. Pre-prepared dehydrated meals are also very convenient but far more expensive.
The food I suggested will provide you lots of energy, settle well in your stomach, fit easy in your pack, be easy to prepare, and be easy to pack the trash out for. If you’d like hot food, you can find cheap, lightweight white gas or Jetboil stoves. It is surprising the great-tasting backpacking meals you can whip up with experience.
5. Plan to Share a Tent with a Buddy
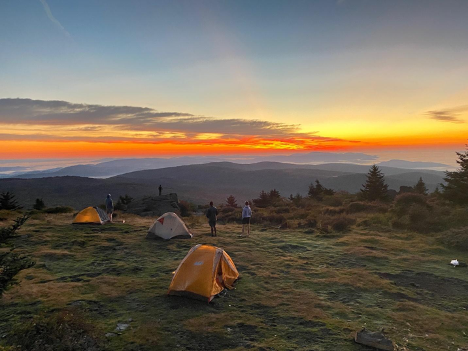
Bringing a tent for yourself accounts for a lot of weight, so having a partner to take the poles and stakes while you carry the tent and the rainfly can be crucial. If you’re feeling ambitious and in a dry, warm weather situation, you may even consider not bringing a tent. I did this at the Grand Canyon, and it made for beautiful star gazing and took a considerable amount of weight off the pack.
6. Share Some Toiletries and Other Essentials
Bring your own personal toothbrush, but pretty much all other toiletries should be divided up amongst the group and shared. Plan to have communal toothpaste, hand sanitizer, and toilet paper. Other essentials include a flashlight or headlamp, lighter or matches, pocketknife, and a trowel. Personally, I consider a deck of cards to be essential as well. I’ve also found bringing some empty storage bags to be very useful for packing out trash and holding miscellaneous objects.
7. Select Good Hiking Shoes
Invest in a nice pair of hiking shoes for the trip if you don’t have any. Blistered feet can quickly ruin a trip, so buy some hiking shoes you find comfortable, break them in ahead of time, and plan to bring 2 or 3 pairs of socks with good padding.
8. Bring a First Aid Kit
It is very common to overlook a first aid kit — as nobody ever expects accidents to happen. I am always surprised at the frequency with which I have used mine during trips. A couple of times, my first aid kit has saved the experience for me or one of my friends.
9. Plan for Rain
Rain can ruin a great backpacking trip if you are not prepared. Bring a rain jacket, rainfly for your tent, rain cover for your backpack, and a dining fly for if you want to eat while it is raining. It may also be worth buying a pair of rain pants.
10. Use Bear Bags
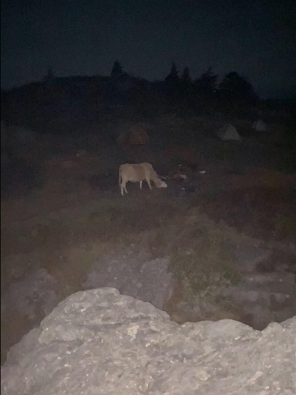
Bears can smell anything, and it is more common than you think for bears to come rummaging through the campsite during the night looking for food. It may seem overly cautious to worry about something like this, but I always prefer to err on the side of caution. Most backpacking locations have ropes tied 15-20 feet in the air at all campsites. These are for you to attach your bear bags filled with smellable items that you hoist up during the night. Personally, I have not had a bear, but a full-grown bull rummage through my campsite, and it is quite terrifying.

I offer these backpacking tips to inspire my classmates to consider taking a weekend off from Institute activity and enjoying a refreshing backpacking trip. We can too easily be engulfed by our busy schedules and forget about what really matters: our health, happiness, and friendships. To perform well at the Institute, you need to be refreshed and alive. Backpacking offers you an opportunity to step aside from the stressful and strenuous graduate student life and spend some time in nature. Personally, I do not bring my cellphone on my backpacking trips so as to completely unplug from what the world has to say, but I understand if you prefer to have yours in case of emergency, although you will likely not have phone service.

If you are interested in a backpacking trip, here are a few great locations within a reasonable driving distance from the Institute that I recommend:
- Grayson Highlands
- Hanging Rock State Park
- The Uwharries
Columnist: Kevin Conroy
